Top 3D Printing Techniques for Rapid Prototyping: A Beginner’s Guide
Top 3D Printing Techniques for Rapid Prototyping: A Beginner’s Guide
Imagine designing a custom gadget part and holding it in your hands within hours. With 3D printing, rapid prototyping makes this possible, whether you’re a DIY enthusiast, a tech hobbyist, or a budding inventor. 3D printing techniques for rapid prototyping are transforming how we create, test, and refine ideas—fast and affordably. In this guide, you’ll learn the best 3D printing methods, step-by-step tips to create your first prototype, and how to avoid common pitfalls. Let’s dive into the world of 3D printing for beginners and make your ideas real!
What is Rapid Prototyping with 3D Printing?
Rapid prototyping is the process of quickly creating physical models to test and refine designs. Unlike traditional methods like CNC machining, which can take weeks and cost thousands, 3D printing lets you produce prototypes in hours for a fraction of the price. It’s a game-changer for DIYers, startups, and tech enthusiasts who want to iterate designs without breaking the bank.
With 3D printing, you can create everything from drone parts to smart home device casings. The benefits are clear: low costs, high customization, and the ability to tweak designs on the fly. Whether you’re new to 3D printing or leveling up, understanding the right techniques is key to success. For more on how 3D printing fits into tech innovation, check out All3DP’s industry insights.
📌 Related reading: Revolutionizing Education with AI
Top 3D Printing Techniques for Rapid Prototyping
Here are three of the most popular 3D printing techniques for rapid prototyping, each with unique strengths for DIY and tech projects.
1. Fused Deposition Modeling (FDM)
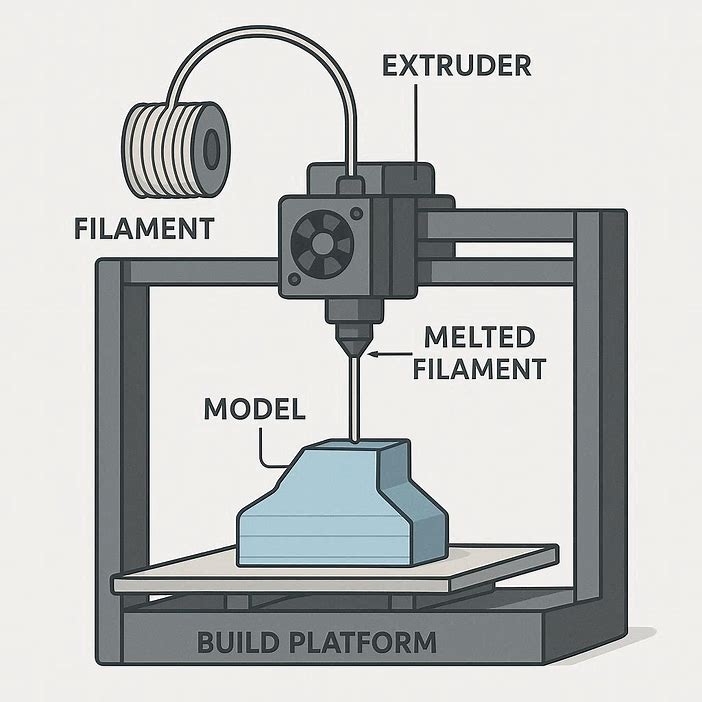
How It Works: FDM printers extrude melted filament (like PLA or ABS) layer by layer to build your model. Think of it like a hot glue gun guided by a computer.
Best For: Affordable prototyping for DIY projects, such as custom phone cases or Arduino mounts.
Pros:
-
Budget-friendly printers (e.g., Creality Ender 3, ~$250).
-
Wide range of filament options.
-
Easy to use for beginners.
Cons:
-
Lower resolution compared to other methods.
-
Slower for complex designs.
Tips: For faster prototyping, set layer height to 0.2mm and use PLA filament, which is affordable (~$20/kg) and easy to print. Calibrate your printer to avoid warping. Learn more about FDM in our post on best 3D printers for beginners.
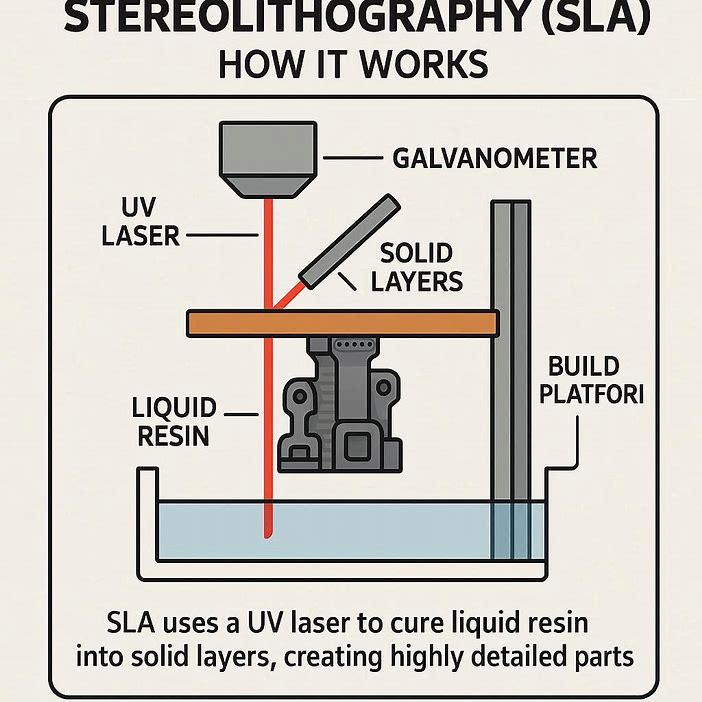
2. Stereolithography (SLA)
How It Works: SLA uses a UV laser to cure liquid resin into solid layers, creating highly detailed parts.
Best For: Small, intricate prototypes, like gadget components or jewelry molds.
Pros:
-
Smooth, high-resolution finishes.
-
Ideal for precise designs.
Cons:
-
Resin is pricier (~$50/liter).
-
Requires post-processing (cleaning with isopropyl alcohol).
Tips: Use SLA for prototypes needing fine details, like camera mounts. Wear gloves when handling resin and cure prints in sunlight or a UV chamber for durability. For resin printing tips, visit Formlabs’ SLA guide.
3. Selective Laser Sintering (SLS)
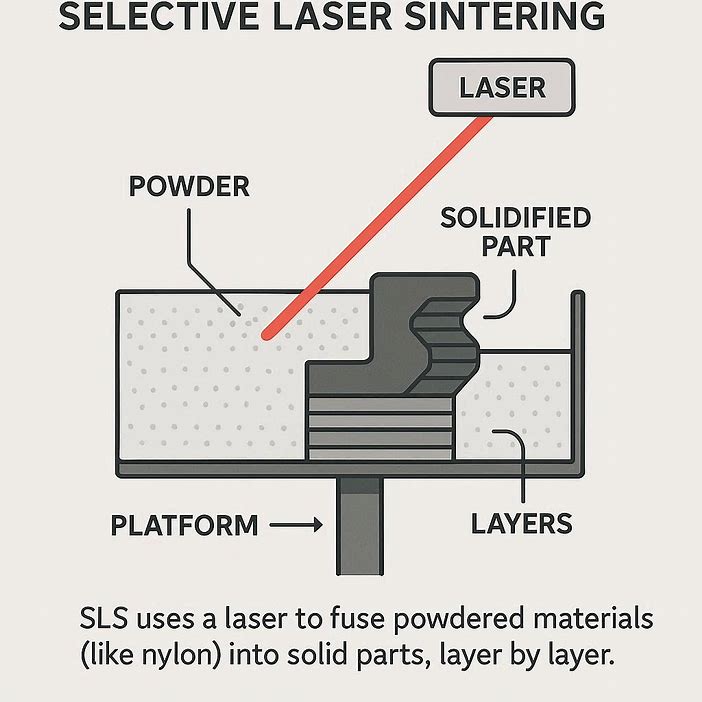
How It Works: SLS uses a laser to fuse powdered materials (like nylon) into solid parts, layer by layer.
Best For: Durable, functional prototypes, such as gears or robotics parts.
Pros:
-
Strong, flexible parts.
-
No support structures needed, saving time.
Cons:
-
SLS printers are expensive ($5,000+).
-
Less accessible for home DIYers.
Tips: For SLS, consider outsourcing to services like Xometry or Shapeways if you don’t own a printer. It’s cost-effective for complex, high-strength prototypes.
📌 Related reading: Build a DIY Power Bank with Recycled Batteries
Step-by-Step Guide to 3D Printing a Prototype
Ready to create your first prototype? Follow these steps to go from idea to reality with 3D printing for beginners.
Step 1: Design Your Model
Start with free design software like Tinkercad’s free design tool (browser-based, beginner-friendly) or Fusion 360 (free for hobbyists).
-
Tip: Begin with simple shapes, like a phone stand, to learn the process. Double-check dimensions to match your printer’s build volume (e.g., 220x220x250mm for Ender 3).
-
Example: Design a custom Raspberry Pi case with cutouts for ports. See our guide on Raspberry Pi projects for DIY.
Step 2: Choose the Right Printer and Material
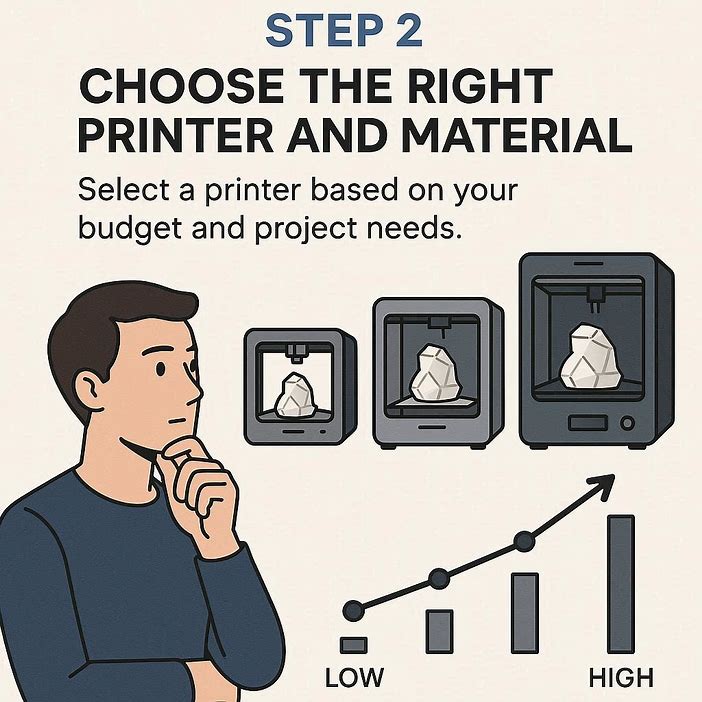
Select a printer based on your budget and project needs:
-
Budget Option: Creality Ender 3 V2 (~$250) for FDM printing.
-
Mid-Range: Anycubic Photon Mono (~$300) for SLA resin printing. Materials matter:
-
PLA: Cheap, easy to print, great for beginners ($20/kg).
-
ABS: Durable but needs a heated bed (~$25/kg).
-
Resin: For SLA, choose standard resin for cost (~$40/liter).
Step 3: Slice and Print
Use slicing software like Cura or PrusaSlicer to convert your design into printer instructions.

-
Settings for Speed: Layer height of 0.3mm, 20% infill, and 50mm/s print speed for quick prototypes.
-
Tip: Enable “raft” or “brim” in Cura to improve bed adhesion for larger prints.
Step 4: Post-Processing
-
FDM: Remove supports, sand rough edges with 200-grit sandpaper, or paint for aesthetics.
-
SLA: Rinse prints in isopropyl alcohol and cure under UV light for 5-10 minutes.
-
Tip: For ABS, use acetone vapor smoothing for a glossy finish. Check our post on 3D printing post-processing tips.
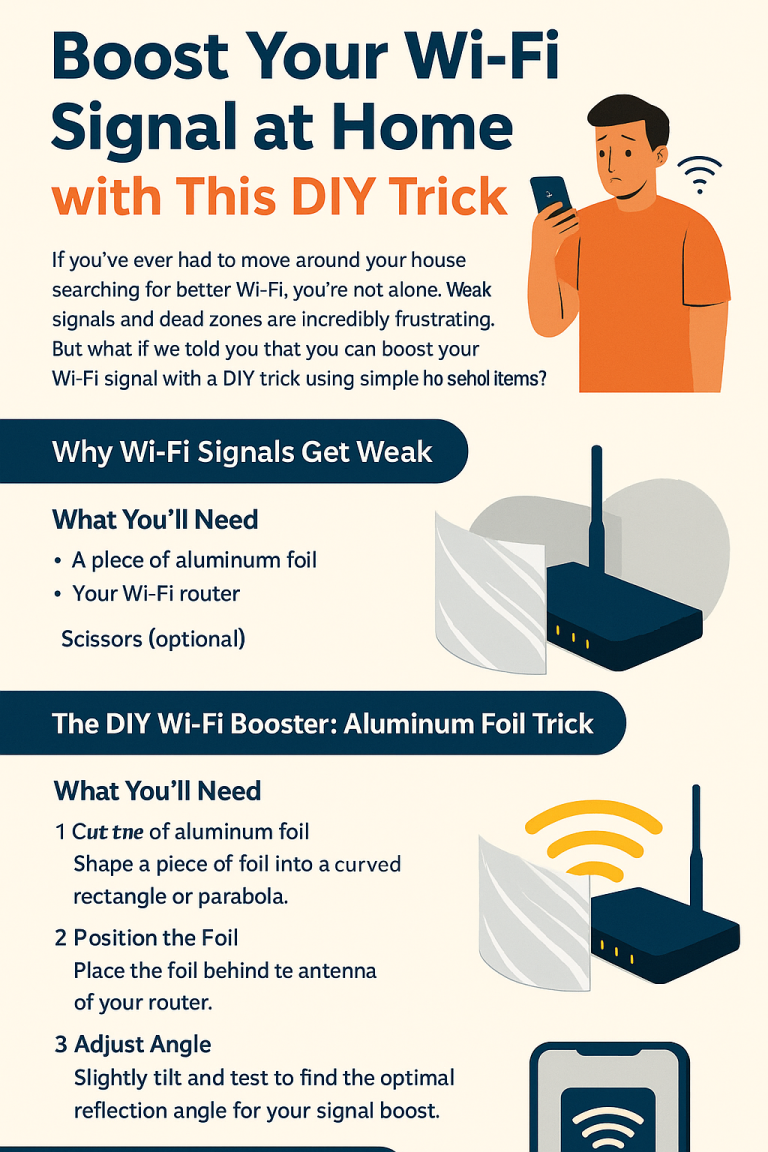
📌 Related reading: Boost Your Wi-Fi Signal at Home with This Simple DIY Trick
Tools and Materials for 3D Printing Prototypes
Here’s what you need to get started:
-
Printers: Creality Ender 3 V2 ($250), Anycubic Vyper ($350), or Prusa i3 MK3S+ ($750 for advanced users).
-
Filaments: PLA ($20/kg), ABS ($25/kg), or PETG ($22/kg) for durability.
-
Software: Tinkercad (free), Fusion 360 (free for non-commercial use), or Cura (free slicer).
-
Accessories: Spatula for print removal ($5), digital caliper for precision ($15), and isopropyl alcohol for SLA ($10/liter).
Tips for Faster and Cheaper Prototyping
-
Optimize Settings: Use 0.3mm layer height and 10-15% infill to save time and material.
-
Draft Mode: For SLA printers, use draft resin settings for quicker prints.
-
Iterate Digitally: Test designs in software to avoid reprinting.
-
Outsource: Use services like Shapeways for SLS if you need high-strength parts without buying an expensive printer.
Common Mistakes to Avoid
-
Overcomplicating Designs: Start with simple models to master the basics.
-
Ignoring Bed Leveling: Uneven beds cause failed prints. Level your printer before every session.
-
Wrong Material Choice: PLA for quick prototypes, ABS or PETG for durability.
-
Skipping Post-Processing: Sanding or curing improves prototype quality and functionality.
Real-World Applications
3D printing for rapid prototyping shines in DIY and tech projects:
-
DIY Projects: Print custom phone cases, tool organizers, or drone frames.
-
Tech and Gadgets: Create casings for IoT devices or Raspberry Pi projects.
-
AI Integration: Design mounts for AI-powered cameras or sensors, like a 3D-printed housing for a smart home security system. Explore more in our post on AI and 3D printing for smart homes.
Conclusion
3D printing techniques like FDM, SLA, and SLS make rapid prototyping accessible, fast, and affordable for DIYers and tech enthusiasts. By following our step-by-step guide, choosing the right tools, and avoiding common mistakes, you can bring your ideas to life in hours. Start with a simple project using Tinkercad and a budget printer like the Creality Ender 3, and watch your prototypes take shape!
Have you tried 3D printing yet? Share your projects or questions in the comments below or on X with #3DPrinting and #DIYTech. Let’s build something amazing together!
FAQ
-
What’s the cheapest 3D printer for prototyping? The Creality Ender 3 V2 (~$250) is a great starter for FDM printing.
-
Can I prototype with resin on a budget? Yes, try the Anycubic Photon Mono (~$300) for affordable SLA printing.
-
How long does a prototype take to print? Small FDM prints take 1-3 hours; SLA can be faster for small parts.